a free video editing software that you can install on your computer. This program will allow you to export videos and images to create new compositions.
Editing a video
Learnhow to join videos, inserttransitions, addtexts, insertanimage, addmusic, orseparate audio from video .
Transitions
Once youhavethemusic, thetext, and thecomposition, it's time to improvetherhythm of the video, withanimatedor simple transitions.
On average, 400 hours of video are uploaded to YouTube every minute. It is fascinating how the creation of audiovisual content is available to anyone.
The scenarios on the Internet have already been created, now it is the turn of the people to offer original and above all quality content. Therefore, analyzing what I need to record a video (be it long or short), is essential since this work prior to taking the camera will avoid editing problems.
In this training, you will learn about the OpenShot program, a free video editing software that you can install on your computer. This program will allow you to export videos and images to create new compositions. In addition to your videos, you can add music, texts, and transitions. You will no longer have excuses to be a great film director.
The module seeks that the participant learns to master the tools for editing audiovisual resources, as well as the elementary principles for the production of videos and special effects in the creation of audiovisual media using resources such as: effects, audio, music and free images.
Get ready to step on the red carpet of the next audiovisual awards, because you are going to master the tools with this course.
Using easy graphic softwares to edit your imagesClick to read
In this section, you will learn about free software image editing tools for the computer, which will allow you to retouch and correct your photographs.
Most of the digital devices allow you to take pictures, you just have to point and take a photo, but why not learn to take good photos or retouch them. The images are in our day to day, for example, on an average day, 80 million photos are shared on Instagram.
In this training you will learn how to use the PIXLR tool, which allows you to make corrections to images such as increasing brightness, balancing contrast or changing the size of the photo so that it is suitable for printing. In addition, you will learn to correct red eyes, many times people come out with a red eye pupil, but we will teach you how to correct it. Finally, once the course is finished, you will also have the necessary knowledge to remove the background of an image and replace it with a plain/gradient color, or with another image, for example, you will be able to change a photo of a beach background for a mountain.
To promote a business, have a souvenir or we simply like to take photography, it is advisable to know how to make them and how to edit them, as well as the different ways to share them without losing our rights and storing them, since they usually take up space.
An opportunity to edit photos and share moments of your life.
Photography is a way of communicating, so it is advisable to take care of our photographs, that is, know how to edit images, how to store and manage images and the use of the images created, how to protect them?
Digital photography broadens social contacts (for example, in special interest groups), keeps older people active (both in the physical and mental sense) and contributes in many cases to promoting the cultural heritage of cities: monuments, styles of life, customs, etc.
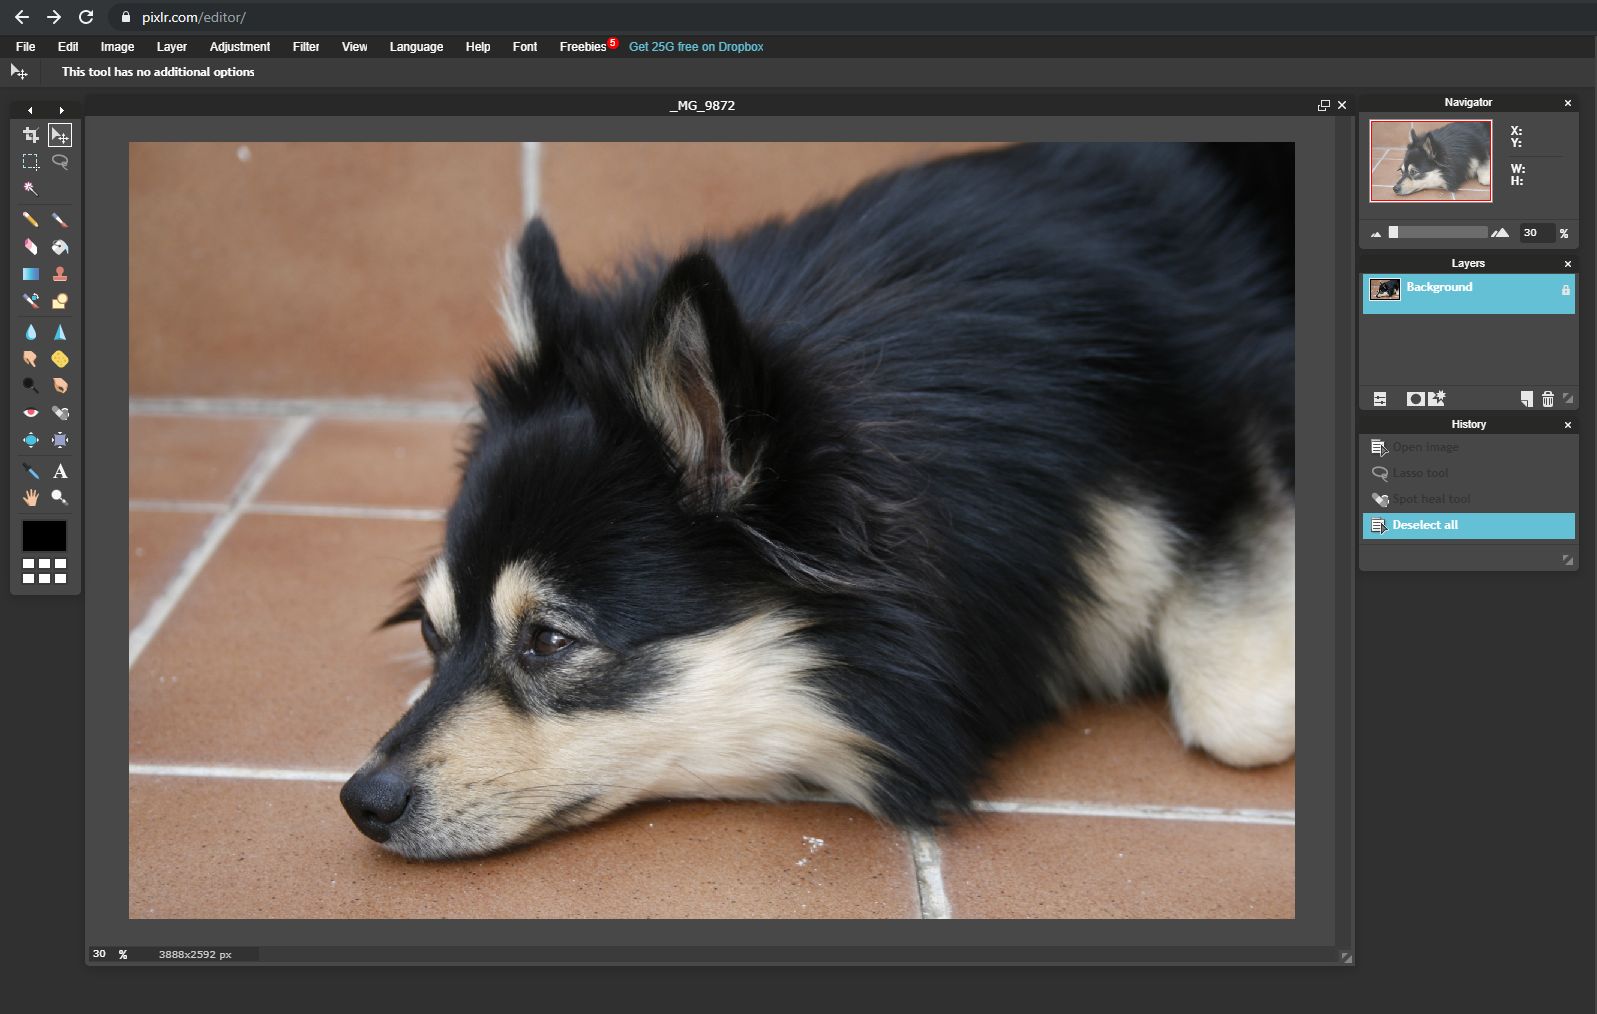
Pixlr is a free photo editing software tool. It is a web-based software and can be used on Windows, Linux, or macOs as well as on mobile devices like Android or iOs, using their mobile app.
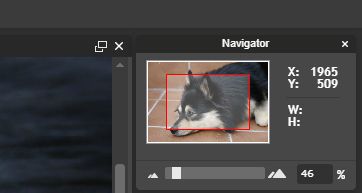
Navigation panel: displays a miniature version of your image. Its default position is placed at the upper right-hand area of the image screen. The navigator panel allows us to zoom in and out and find our way around the photo. Slide the sliding bar to the left to zoom out or to the right to zoom in. It also allows us to enter a zoom ratio like 25% or 75% in the percentage box. The red contoured area on the miniature let us know our position in the picture.
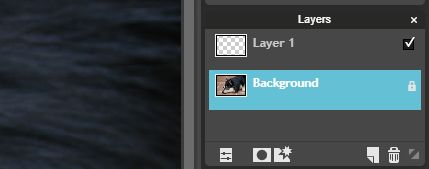
Layers panel: is placed one step down from the navigation panel, in the middle of the right-hand side of the image screen. The Layers panel is used to create, select, edit, and rearrange layers of adjustments to your original image.
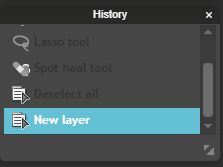
History panel: at the bottom right-hand side of the image screen. This panel shows a list of all changes that have been made to the image.
It allows us to navigate through past edits by selecting them. Going back to a previous edit and changing the image will erase all edits after that point, replacing them with new ones.
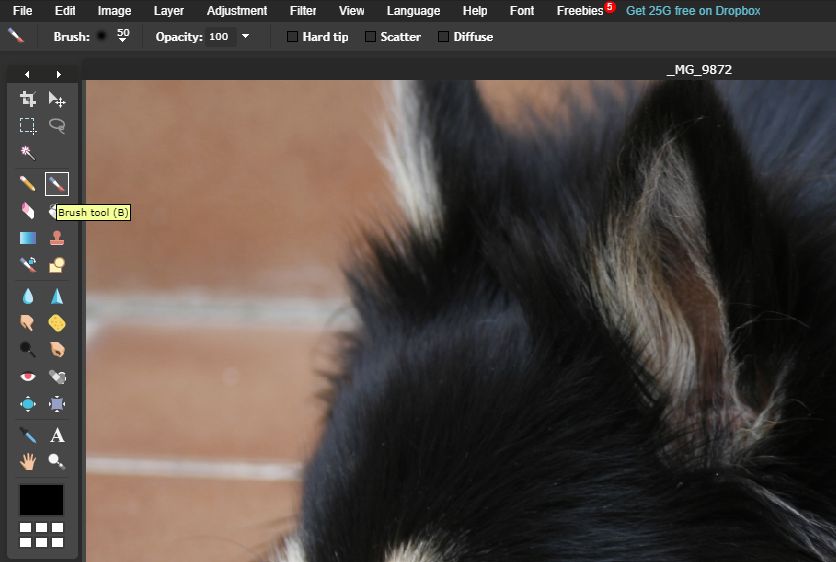
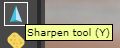
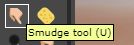
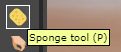
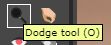
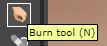
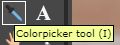
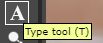
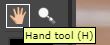
Tools panel: is positioned on the left-hand side of the image screen. It contains buttons for many of the editing tools. Holding the mouse cursor over one of these buttons will display the name of the tool. When a tool is selected, a list of options is displayed at the top of the screen just beneath the toolbar. These options modify the configuration of the selected tool, such as size, opacity percentage, style, blending mode, etc.
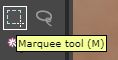
Marquee tool – Click the button, then click and drag your screen to select a square or rectangular area.
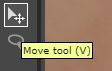
Move tool – Click the button, then click and drag your screen to move your layer, selection, etc.
Lasso tool – Click the button, then click and drag your screen to make selections freehand. To complete the selection, close the loop by dragging all the way back to your starting point.
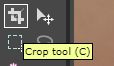
Crop – Click the button, then click and drag your screen to crop down to whatever you have selected.
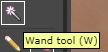
Wand – Click the button, then click on an area in the image and all the adjacent pixels with numeric color values within the specified tolerance of the pixel value will be selected. The Tolerance setting allow us to control the sensitivity of the Wand tool.
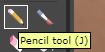
Pencil tool – Click the button, then click and drag your image to draw freehand.
Eraser tool – Click the button, then click and drag your image to erase that area.
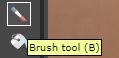
Brush tool – Click the button, then click and drag your image to draw freehand shapes.
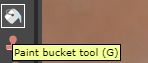
Paint Bucket tool – Click the button, then click your image to apply a solid color to that area.
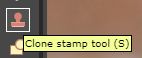
Clone Stamp tool – Click the button, then hold down SHIFT and click an area of the image that you’d like to clone. Release SHIFT, then move the cursor over the area where you want the cloned image to be and click and drag; a selected area around your source will then appear wherever you click and drag. This is a very useful tool for covering imperfections (ex. cloning a smooth area of skin over a blemished area).
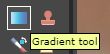
Gradient tool – Click the button, then click and drag your image to apply a color gradient to that portion of the image. The color of the gradient comes from the two color patches in your Tools panel (usually white and black as the defaults). Change the color patches to change the color used in the gradient.
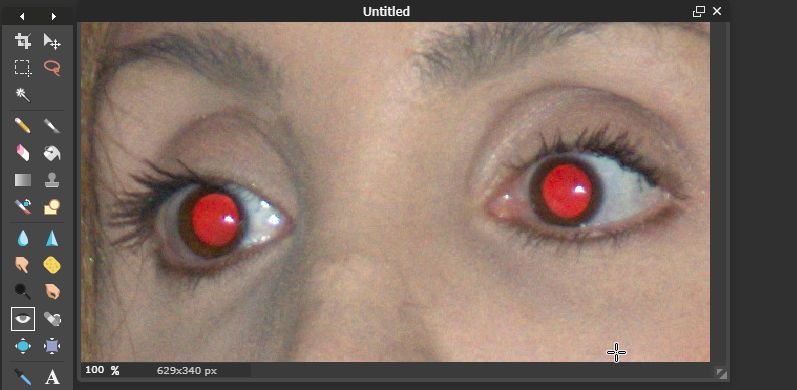
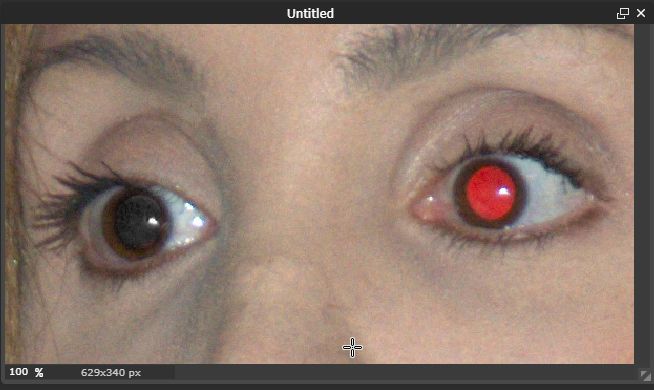
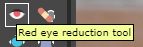
Red Eye tool – Click the button, then click on the red parts of the eye in the photo to correct those areas.
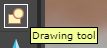
Drawing tool – Click the button, then click and drag to draw freehand shapes.
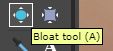
Bloat tool – Click the button, then click your image to fatten up that area. Useful for making lips poutier, eyes bigger, etc.
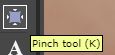
Pinch tool – Click the button, then click your image to shrink that area. the type of gradient by changing the options at the top of the screen.
Color Picker tool – Click the button, then click a color in your image; that color will now be the mail color in you color patches. To select a picked color as the alternate (i.e. background) color in your color patches, hold SHIFT while clicking.
Text tool – Click the button, then click and drag your image to create a box into which you can type.
Hand tool – Click the button, then click and drag your image to scroll it around.
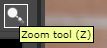
Zoom tool – Click the button, then click your image to zoom in, or hold SHIFT key and click to zoom out. Also, it is possible to use the mouse wheel to zooming in and out.
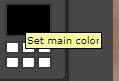
Set main color tool – Clicking the button will display a color selector window on the center of the screen. This windows allows the user to select the main color.
Menu bar: Placed on the top of the screen allows us from opening a new image and saving to make brightness or color adjustments.
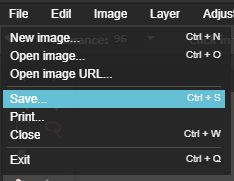
File menu: Using the File menu it is possible to create a new image, open an image (through local desktop or URL). Also, we can save the current image, print or close it. Exit the program is also possible through this menu.
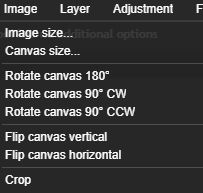
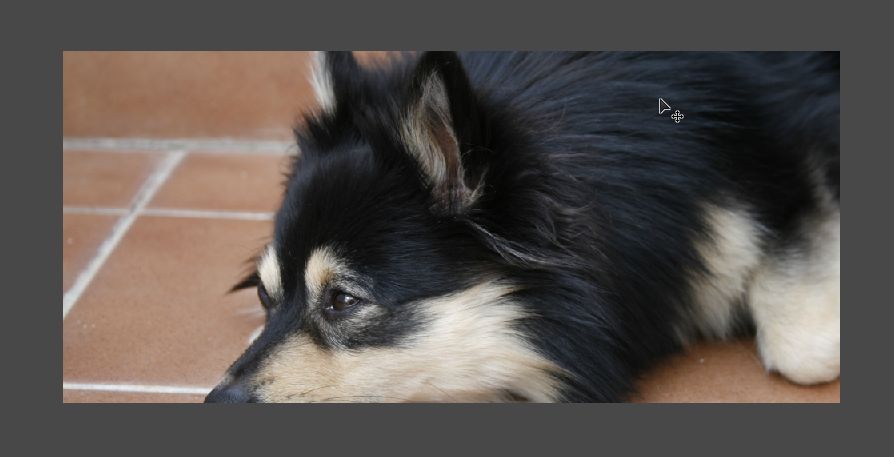
Image menu: through this menu it is possible to change the image or canvas size, to rotate or flip it, and to crop a selected area.
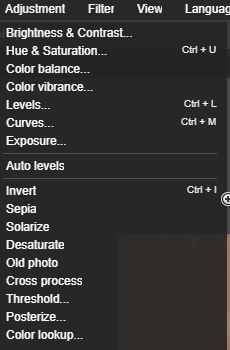
Adjustment menu: here we find Brightness & Contrast , Hue & Saturation , Color balance , Color vibrance , Levels , Curves and Exposure.
Using the menu bar to change the size, brightness and color of an imageClick to read
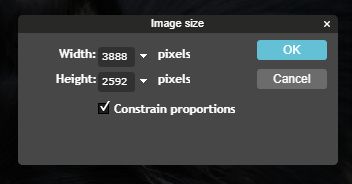
Size:
By choosing the Image size menu we can change the width and height parameters of the image, always measured on pixels. It also allows to keep the proportion of the image by clicking a checkbox placed at the bottom of the window. Then if we want to change the size of the image all we must do is to enter the desired size value for each parameter: Width and Height .
Changing these parameters without constraining proportions will transform the image, adjusting it to the new size. So, in the case one of the parameters we modify is larger than the original setting, the image will expand vertically or horizontally, depending on the parameter that has been changed. Modifying the size of the image will also change the size of the canvas.
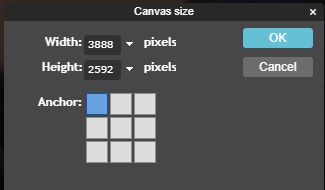
On the other hand there is an option for changing the size of the canvas. This will modify the dimensions of the “box” that “contains” the image, but will not modify the size of the image. So, if the input value is lower than the original one, the image will “crop” (the difference to the crop tool is that this do not really crop the image. The parts of the image that stay out from the “box” stay intact, they are not eliminated).
The Canvas size window works in the same way that Image size does. The difference is that this one does not have a proportion constrainer checkbox, but instead an anchor option. By selecting one of the nine squares we define the sides that are expanded or shrunken. Then, by selecting the upper-left square the canvas will only modify on right and down sides. If we set it on the center square, it will expand or shrink in all directions.
Using crop tool to change the size of the imageClick to read
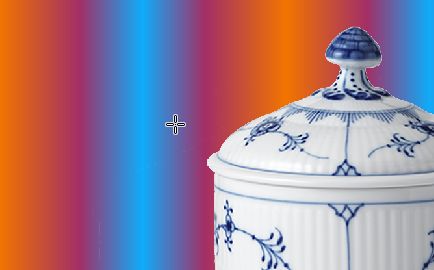
Crop tool allows us to remove portions of a photo to create focus or strengthen the composition.
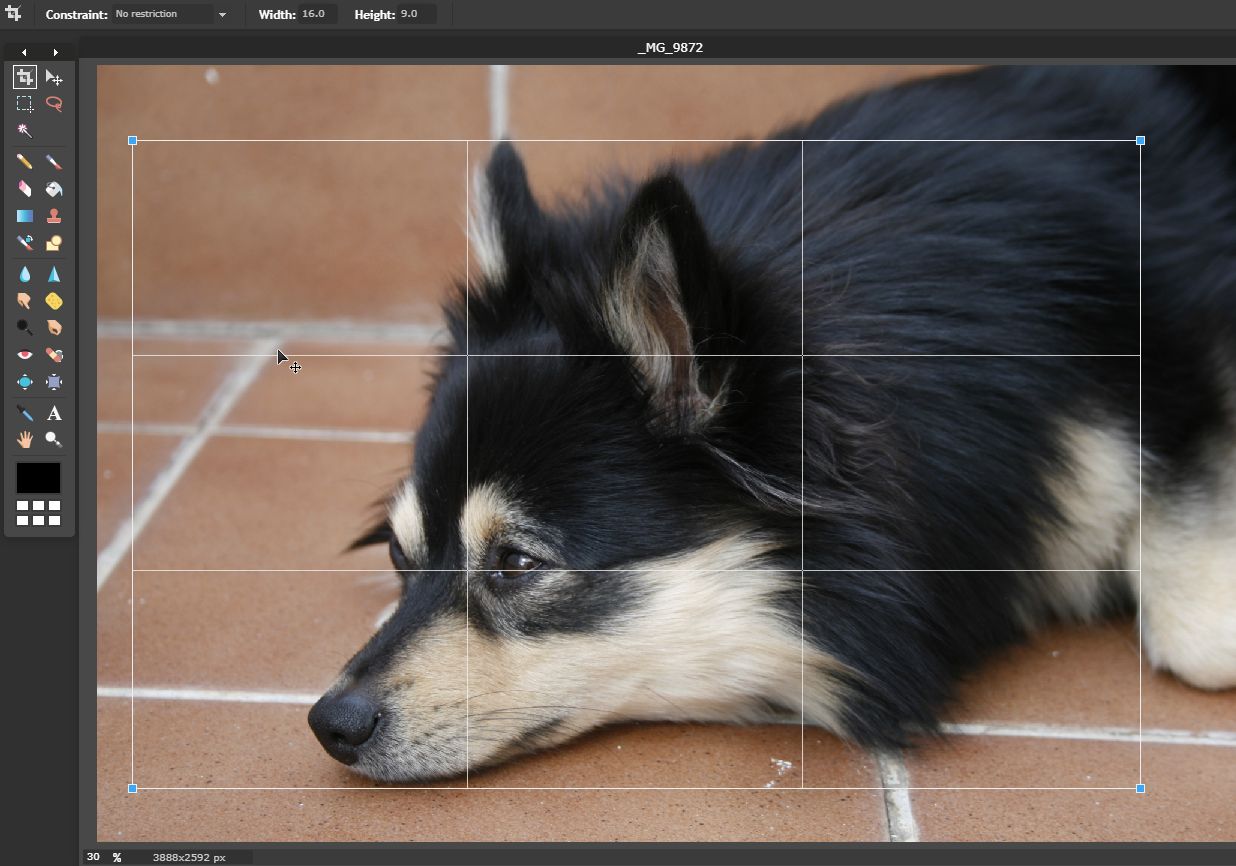
It is possible to use it by clicking on the Crop tool icon or pressing the shortcut ( C ) . Once it is selected, the top menu will show some relative parameters: constraint, width and height. While width and height let us to define the size of the crop area, constraint set some restrictions to this area: Aspect ratio or Output size . Aspect ratio allows to set the proportions we want by entering the relation between the width and height values. In this way, if we, e.g., set the width to 9 and the height to 16, the proportion will be similar to the actual smartphone’s screen aspect ratio. Setting Constraint on Output size option will restrict the cropping area to the original aspect ratio of the image.
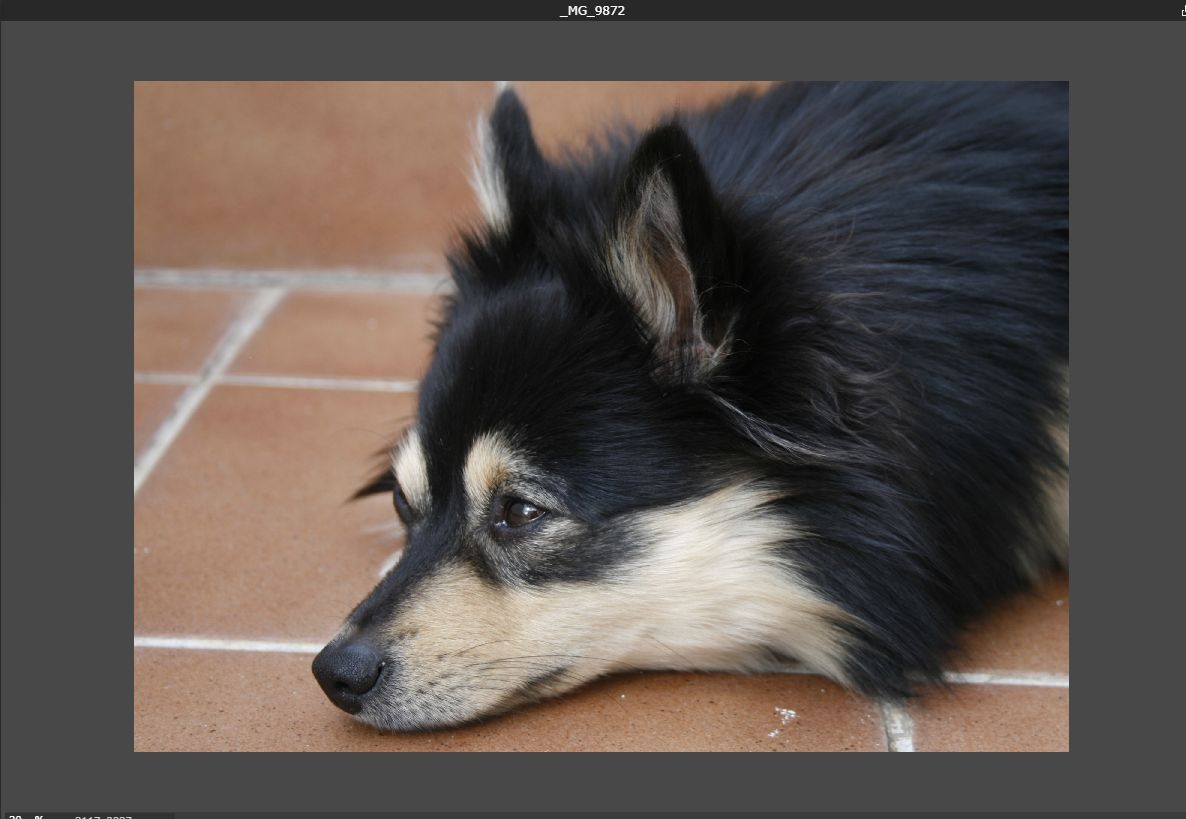
Once we set the desired parameters we can use the tool by selecting the area we want to crop. This is done by clicking and dragging the mouse course over the image.
It is possible to adjust the selection by dragging any of the blue points placed on each corner. When the looked-for area is selected press RETURN for performing the crop, or click outside the image and click the Yes button in the window displayed.
IMAGE ADJUSTMENTS: BRIGHTNESS, CONTRAST AND COLORClick to read
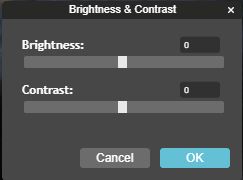
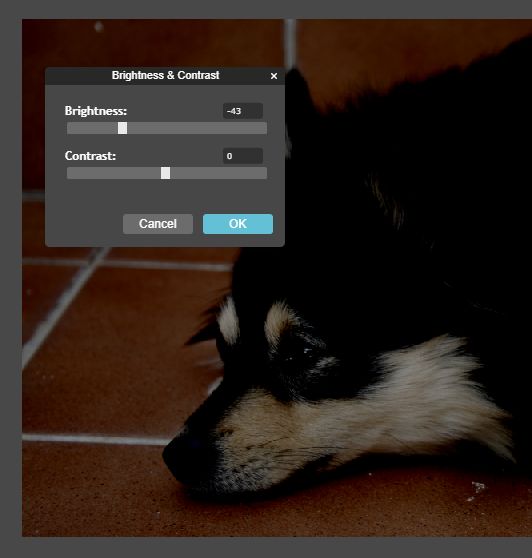
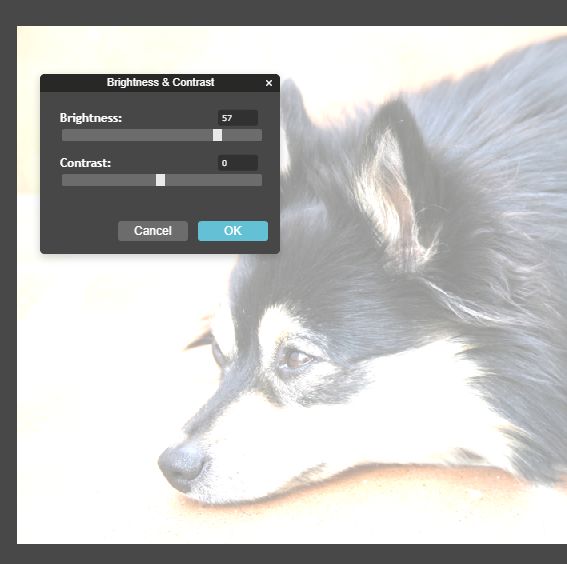
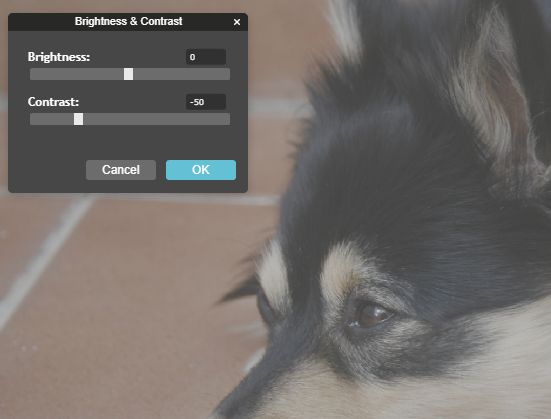
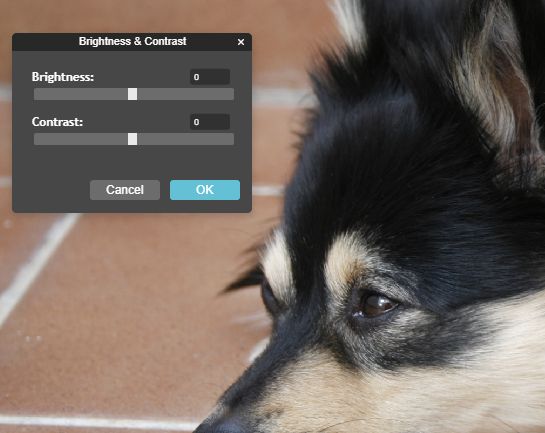
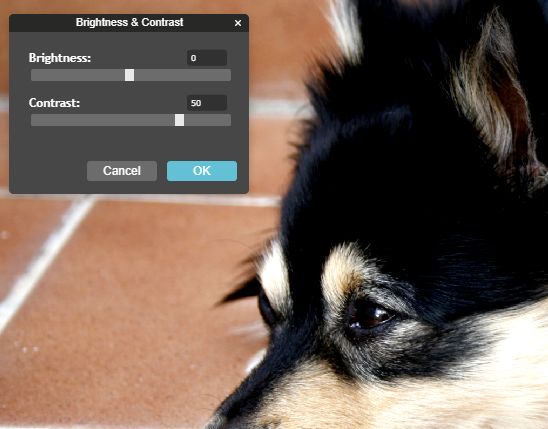
Brightness and contrast: Brightness & Contrast option is placed on the Adjustment menu.
Clicking on this displays a new window with two slide bars;one for brightness and another for contrast. Each one changes its respective parameter, if the slide is dragged to the right side, this will change the parameter in positive way (adding bright or contrast), on the other hand, if it is dragged to the left, then it will define a negative value. The value can be also modified manually by entering the desired value on the box placed on the right side of the window. Increasing the brightness makes every pixel in the frame lighter; decreasing the brightness makes every pixel darker.
While brightness refers to the overall lightness or darkness of the image, contrast is the difference in brightness between the lightest and darkest areas in the image. Increasing the contrast makes light areas lighter and dark areas darker.
USING LEVELS FOR A BETTER BRIGHTNESS AND CONTRAST CONTROLClick to read
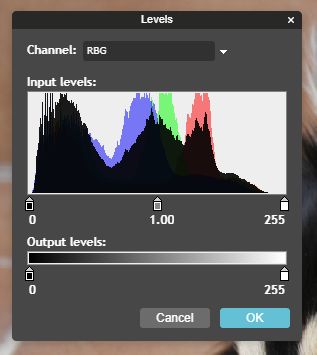
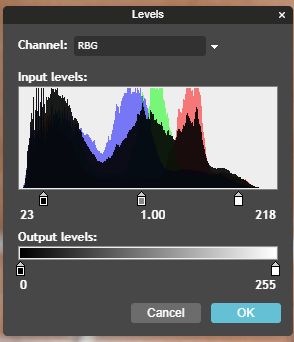
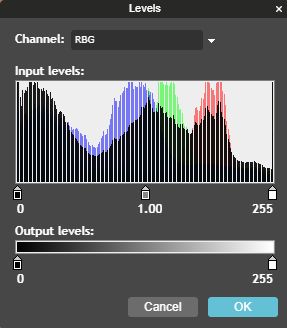
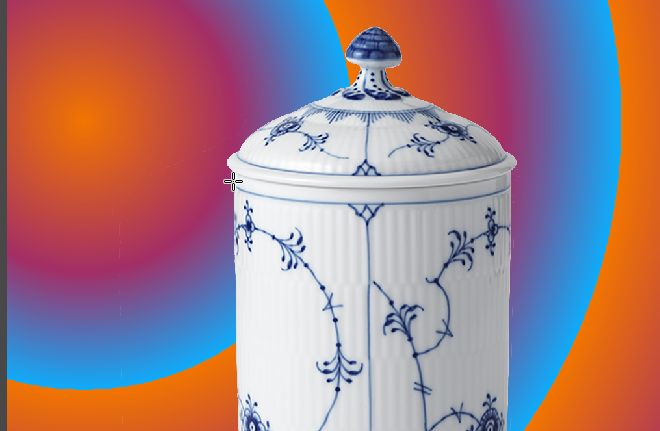
Also placed on the Adjustment menu, Levels is a tool which can move and stretch the brightness levels of an image histogram.Histogram is a graph that shows how the 256 possible levels of brightness are distributed in the image. Brightness is represented by the horizontal axis, and it goes from 0 (shadows) placed on the left to 255 (highlights) on the right. The vertical axis represents the number of pixels that correspond to each level of brightness.
Opening the Levels tool window displays the Input level (or histogram), the Output levels , and the Channel selector options.
The Channel selector allows us to decide in which channel we want to make the changes. The default option for Channel settings is RBG (Red Blue Green), but it also allows us to choose each channel separately. If the RBG channel is selected, all the changes we do on the levels will affect all channels. If we want to modify a specific channel, we can select it individually by changing the channel option to the
desired channel Red , Blue , or Green .
On the histogram we find three main components: black point, white point, and midtone slider. The position of the black and white point sliders redefine the histogram's Input levels so they are mapped to the Output levels (default is black (0) or white (255), respectively), whereas the midtone slider redefines the location of middle gray (128).
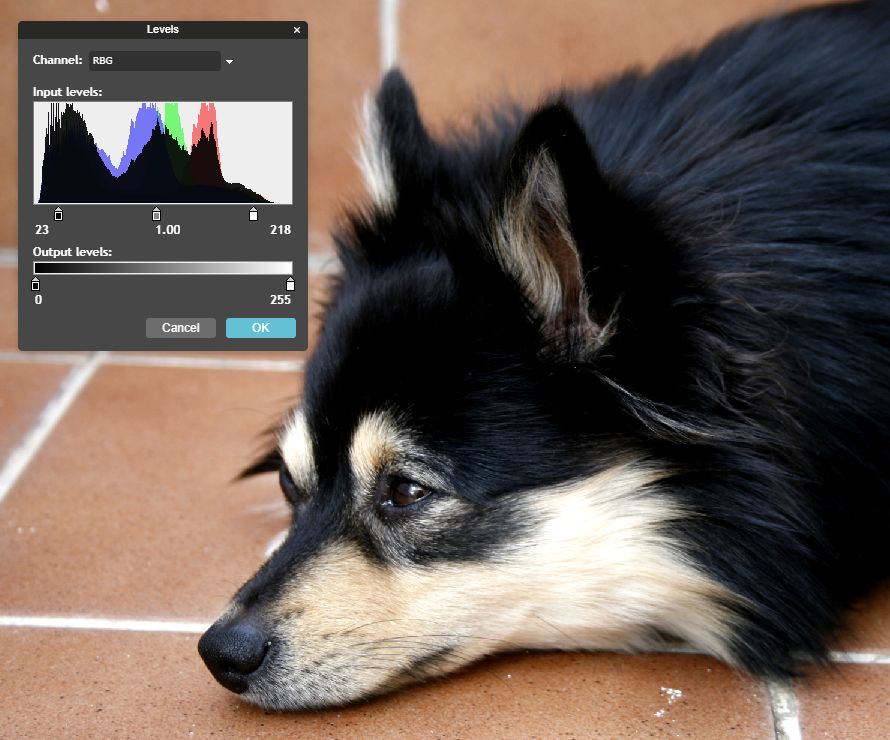
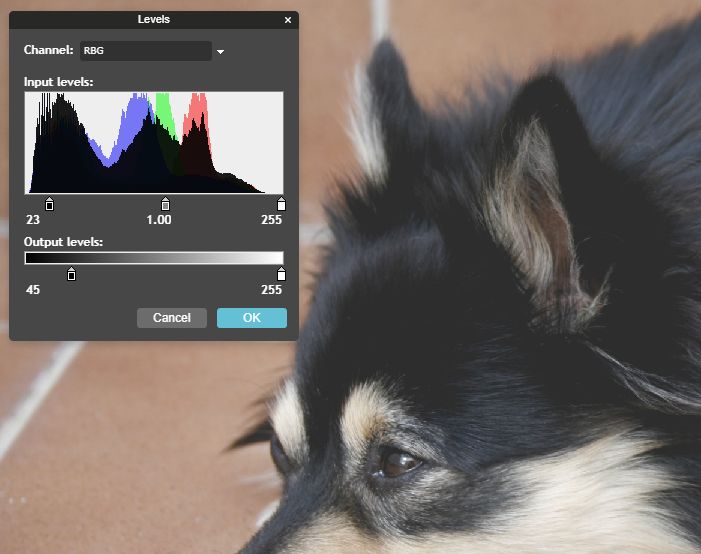
On the image used above, there are no pixels on the complete black (0 level) nor the complete white (255 level). As we said before, contrast is the difference in brightness between the lightest and darkest areas in the image. This means that if we want to increase the contrast, we must increase the gap between darkest and lightest pixels by increasing the number of pixels in the pure black value (0) and the number of pixels in the pure white value (255). We are not going to increase the amount of pixels in each value, instead we can set some of the current pixels as the new “pure black”. This is to, for example, set pixels that are in the 14 value as the new 0 value, so this pixel will be the new pure black.
Here, as an example, we have set the value 23 and 218 as the new “0” and “255” respectively, so when we click OK these changes are applied and if we open Levels adjustment again we will notice that the amount of pixels in 0 value or maximum black has changed, same for maximum white. Then if we consider that an image needs some regions to be completely black or white, we can use this tool to set where the maximum black or white begins. Also, it provides us with a midtone slider which allows us to brighten or darken the midtones of the image. On the other hand, we have the Output levels option which lets us to set maximum black or white value of the image. By default, it is 0 (max. black) to 255 (max. white), changing it, for example from 0 to 45, it will set 45 as the darkest value possible in the image, so it will never reach maximum black (0).
Adjusting color: hue & saturation, color balance and color vibrance.Click to read
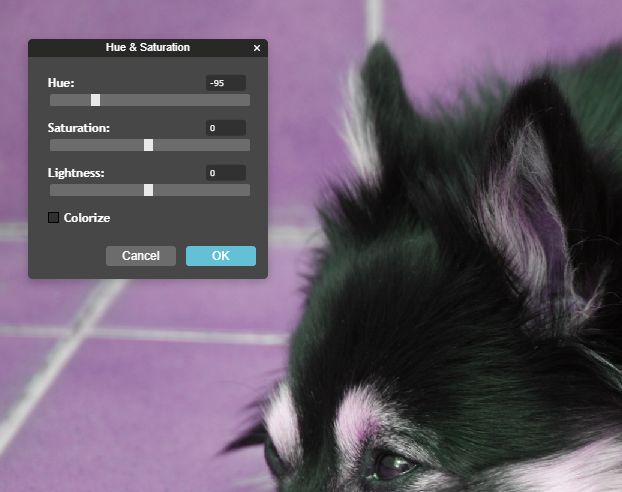
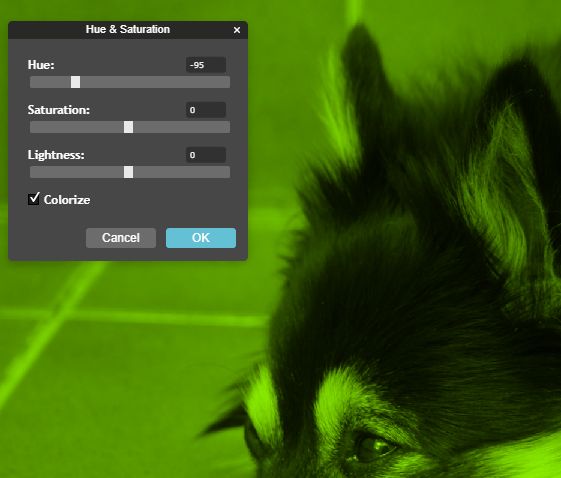
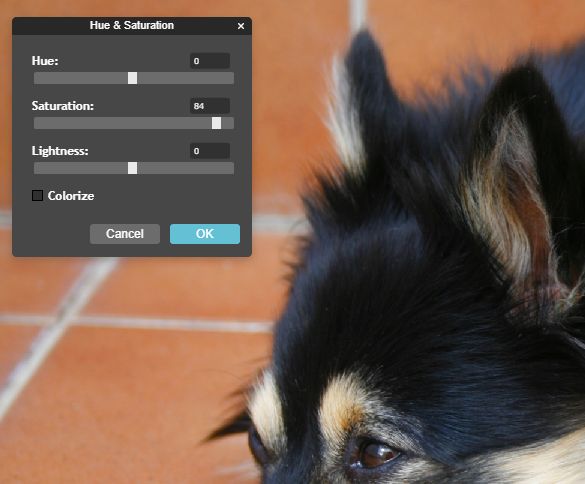
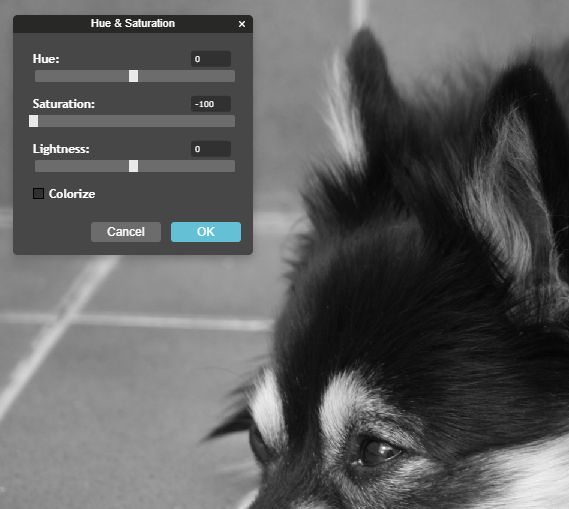
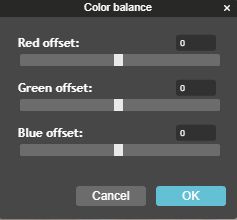
In the adjustment menu, pixlr offers three options for color parameters which can be used for making changes on colors: hue & saturation, color balance and color vibrance. Hue & Saturation contains three parameters: Hue, Saturation and Lightness.
The Hue slider changes the color of the entire image or make it to look monochromatic if the colorize checkbox is marked.
The Saturation slider make colors more vivid or muted. Sliding it to the right increases the saturation, sliding to the left decreases it.
And Lightness slider is used to lighten or darken the image in the same way “brightness” adjustment does.
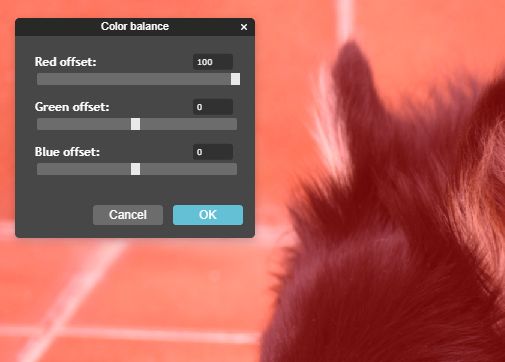
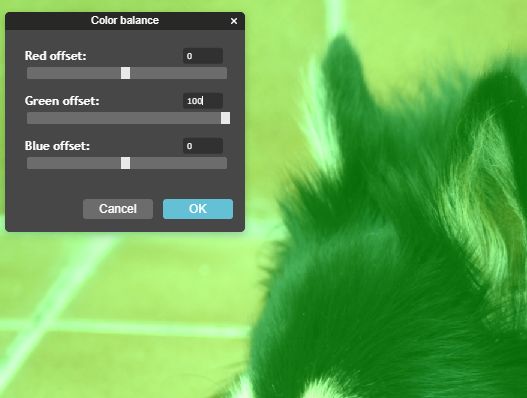
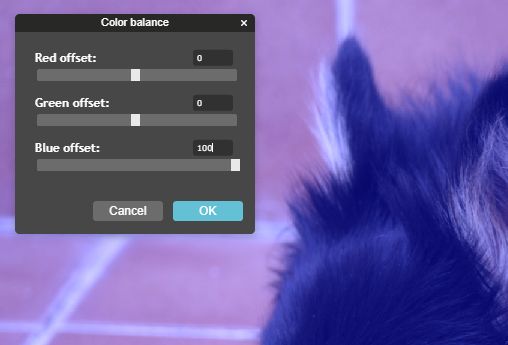
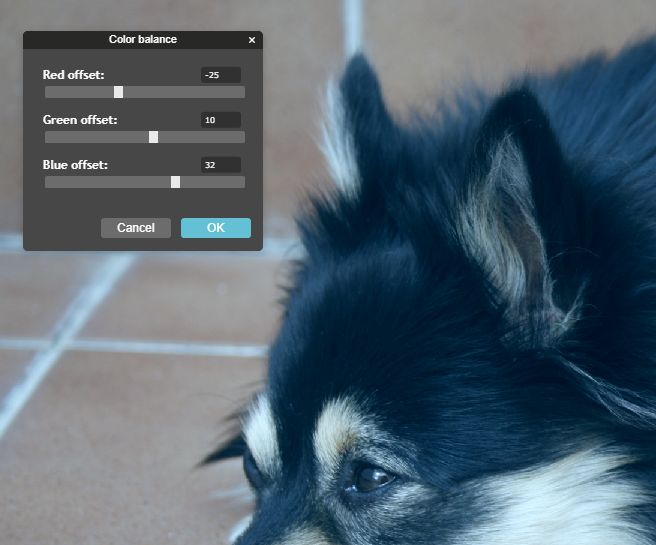
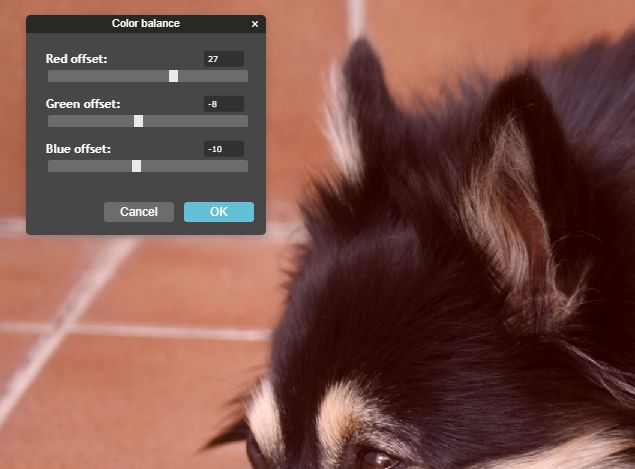
Color balance allows us to make some simple changes in color, adjusting it without affecting its contrast. On its window we find three parameters: red offset, green offset and blue offset. Each one refers to one color and it changes the amount of each one by sliding them to the right for adding color, or to the left for subtracting it.
You can slightly change them to make the picture look colder or warmer, or to make some minor corrections.
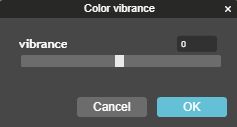
The Parameter menu: Color vibrance, allows us to cause lower saturated colors to turn vivid, without allowing clipping to occur for the higher saturation colors. It is useful to modify the colors without oversaturating them.
Note: Clipping is a result of capturing or processing an image where the intensity in a certain area falls outside the minimum and maximum intensity which can be represented. The clipped area of the image typically appears in the darkest and brightest spots in the image.
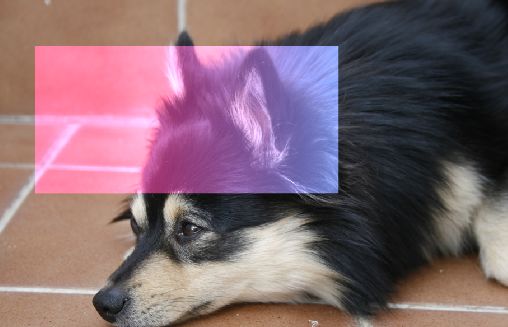
Use of lasso, wand, gradient and eraser tools. Click to read
Pixlr has some good tools for selecting portions of an image. They are the Lasso tool and Wand (also called “Magic wand”) tool .
Selection tools are useful for modifying specific portions of the image without making changes on the surrounded area, or for cutting things out from the image. While the Magic wand is truly effective for simple backgrounds, Lasso tool is great for selecting things from complex ones.
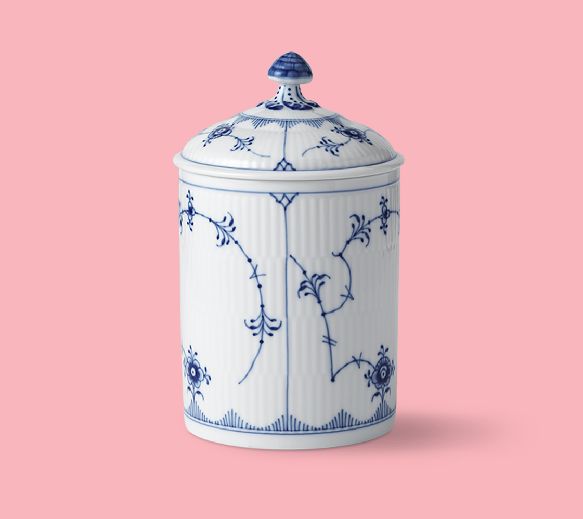
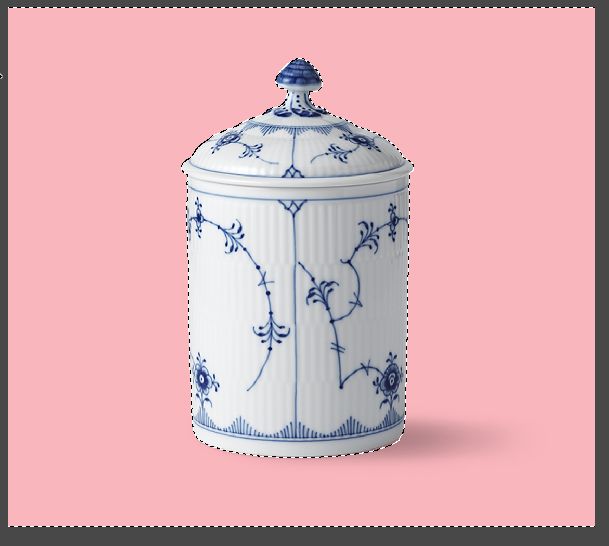
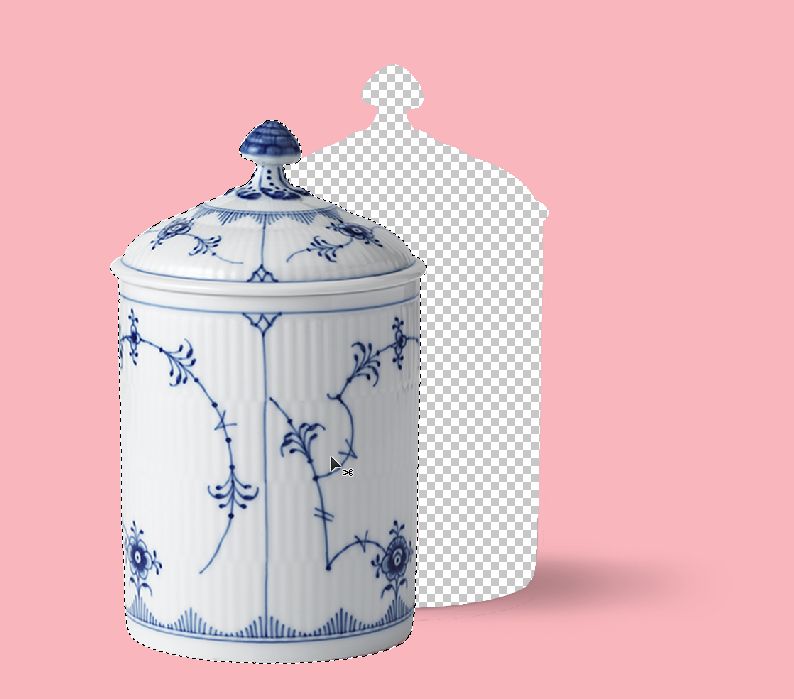
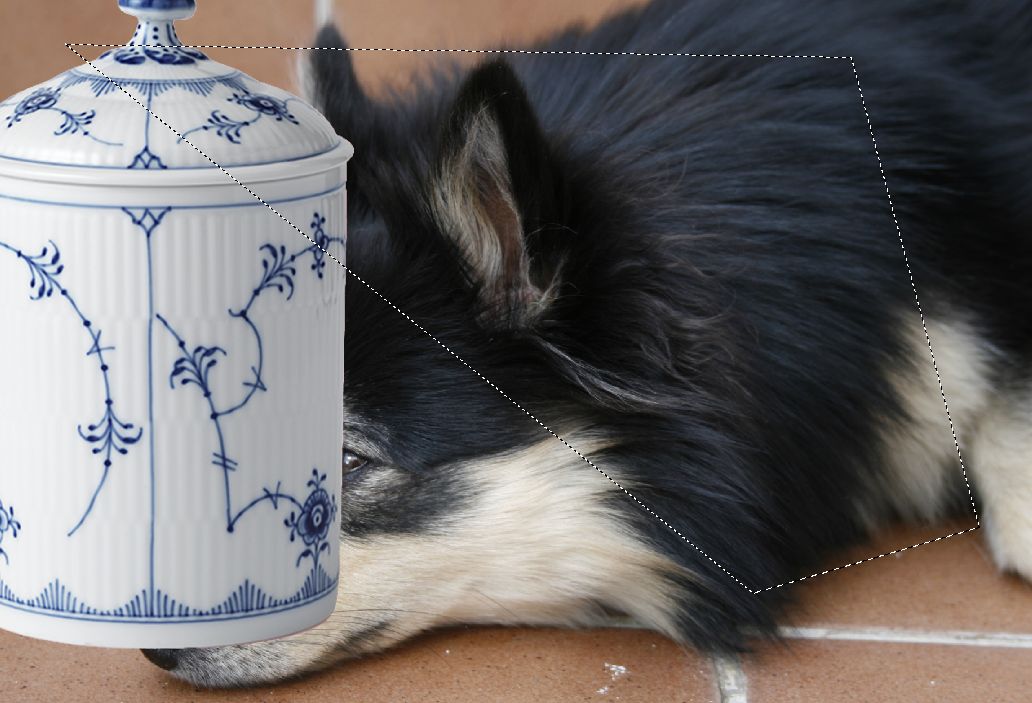
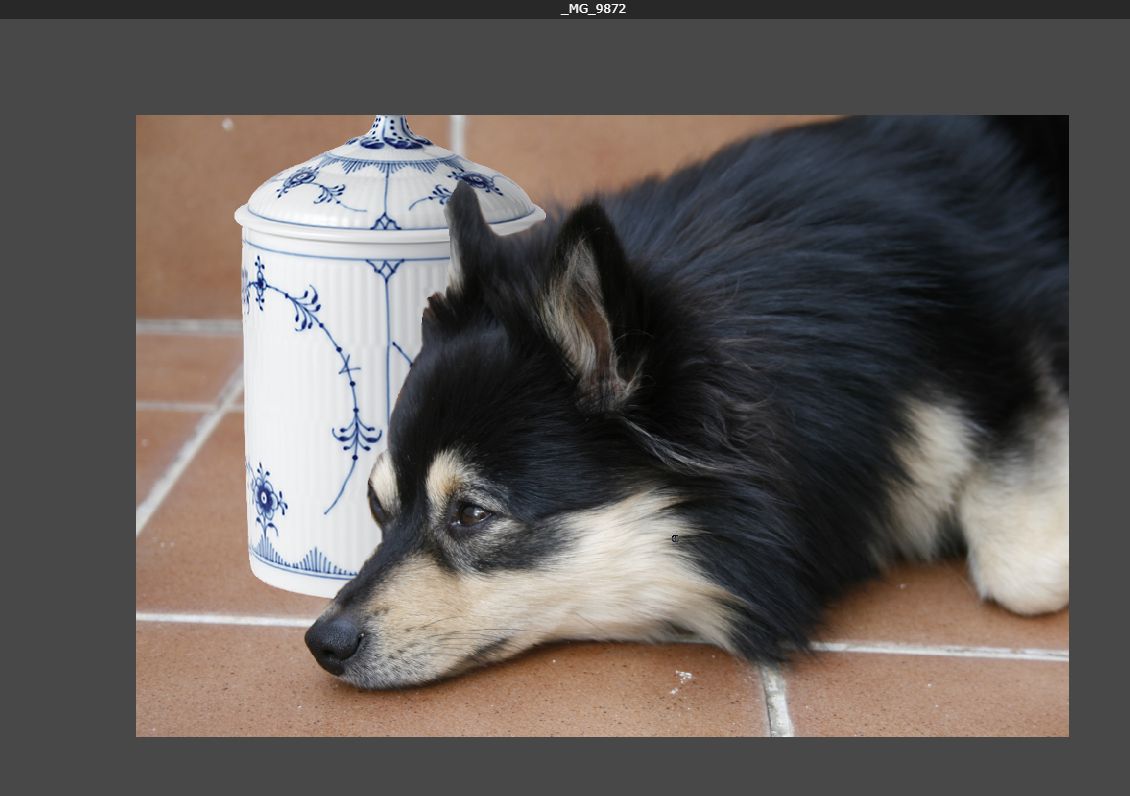
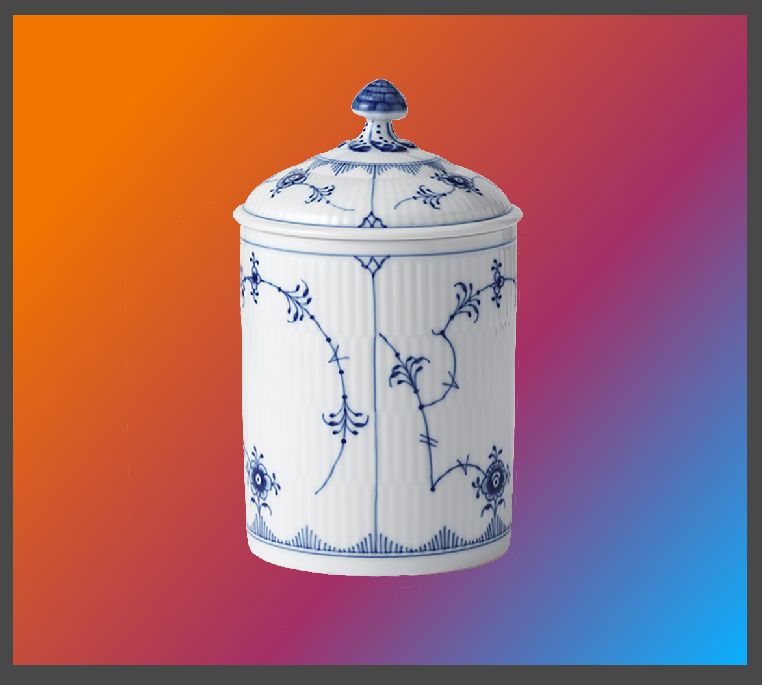
If we need to cut out an object from pictures like the one from above, we can do it in an easy and fast way thanks to the Magic wand.
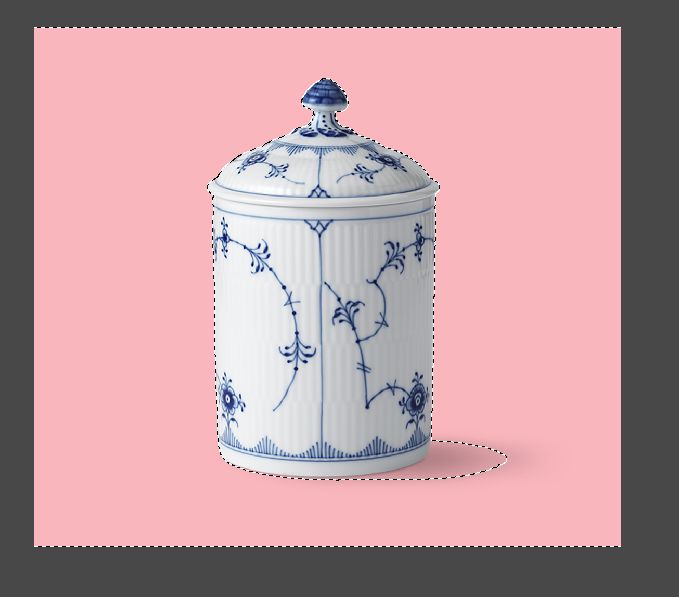
All we need to do is to select the Magic wand tool and click on the area we want to get rid of. Then Magic wand will outline the area selected with flashing dotted lines.
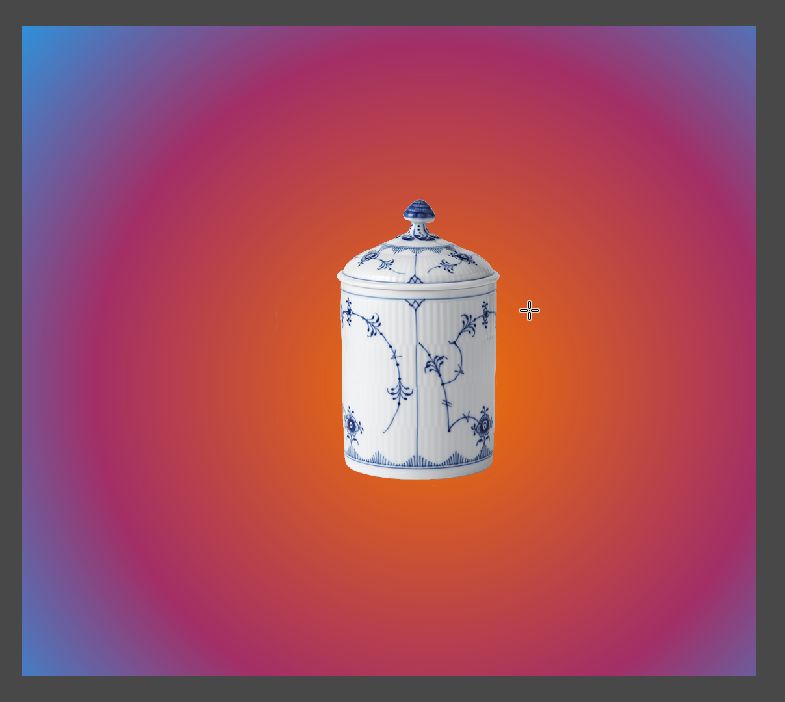
It has almost selected the whole background; the shadow of the object is out from the selection. One thing that will help us to use Magic wand properly with shaded backgrounds is to do click again over the shadow while holding down the shift key. Shift key is a modifier key that changes slightly the way each tool is working. By holding it down while using selecting tools allows us to add new selections to the previous one. We will notice that a plus (+) symbol appears under the Wand mouse icon. There are other modifier keys like CONTROL (on PC) or Command (on macOS) which in the case of selection tools will show a minus (-) symbol under the mouse Wand icon and let us to subtract areas from the selection. Thus, in order to isolate the jar we need to add the shadow to the selection by holding down the SHIFT key and click on the shadow.
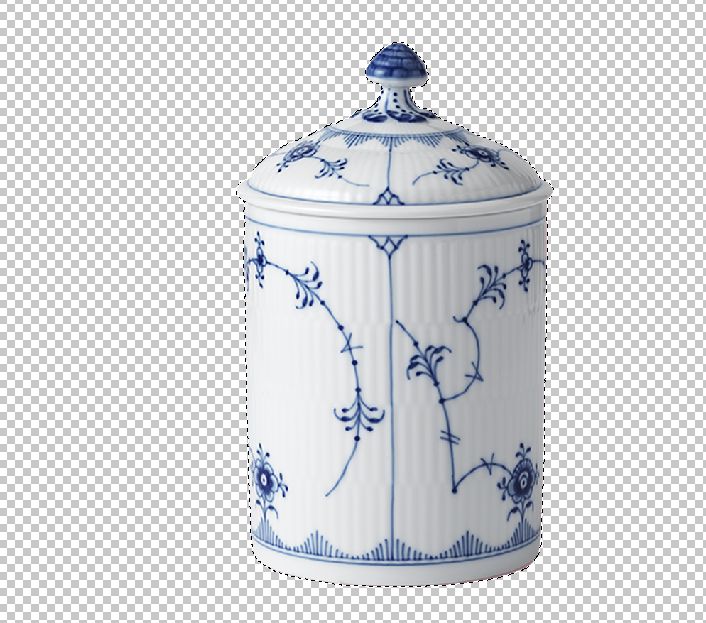
We may notice that some areas of the jar have been selected. It is possible to solve this subtracting them from the selection by holding the CONTROL key and clicking on it.
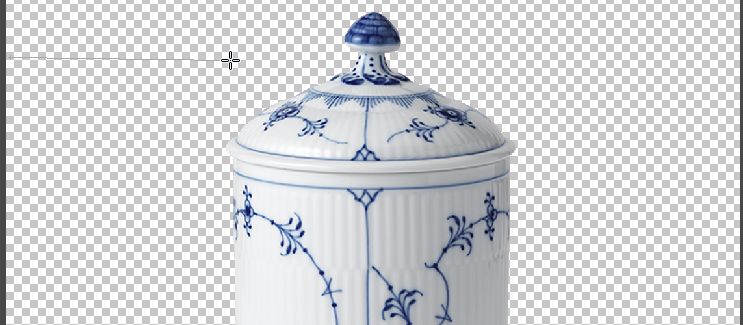
Now that the jar is perfectly selected, we can erase the background to isolate the item or, if we want to keep the background, we can invert the selection and copy, or cut, the selected item from it.
Clearing the background by pressing DELETE, or SUPR, key will show the new background as transparent, which is represented through a pattern of small grey and white squares.
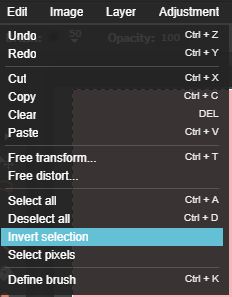
Inverting selection is possible from the menu bar on the top by selecting Edit > Invert selection.
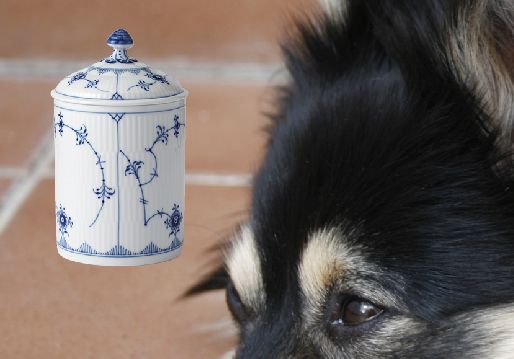
We may notice that the flashing dotted lines are only on the item contour and not over the perimeter of the whole image like before. This means that selection has been inverted. Therefore, it is possible to isolate or clone the object without deleting the background. If we cut it (Ctrl + X) to paste it (Ctrl + V) in other image, the shape of the item will “refill” with the squares patterns, the item has been copied to
our clipboard, but deleted from the original image. Then, we can move the isolated item by using the Move tool which work by dragging the item you want to move. In any case, you must be sure that the object you want to move is selected, and that the layer where it is in, is highlighted in blue.
Note: Take in mind that if you want to paste it over another background/image you must open the new one in the current document. In desktop software it would be able to paste it into different documents, even into different programs, but as Pixlr is web-based it is not able to copy through different documents.
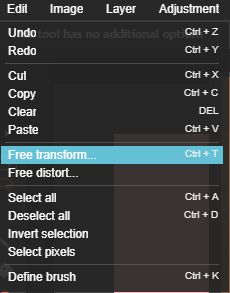
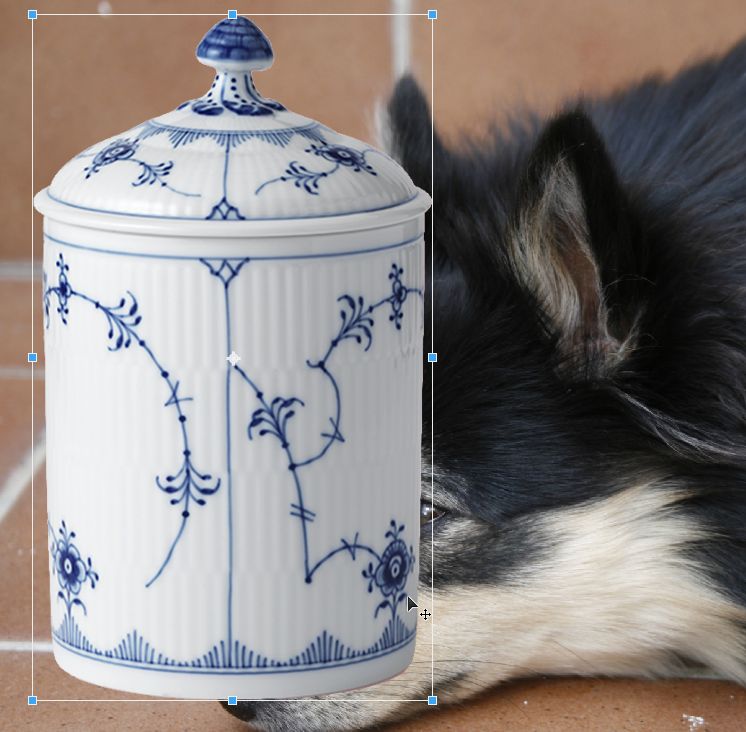
We can change the size of the pasted object by clicking on Edit > Free Transform (Ctrl + T) and dragging one of the blue dots that appear around the item. It is possible to keep the proportions of the object by holding down the SHIFT key while dragging, in other case it would deform.
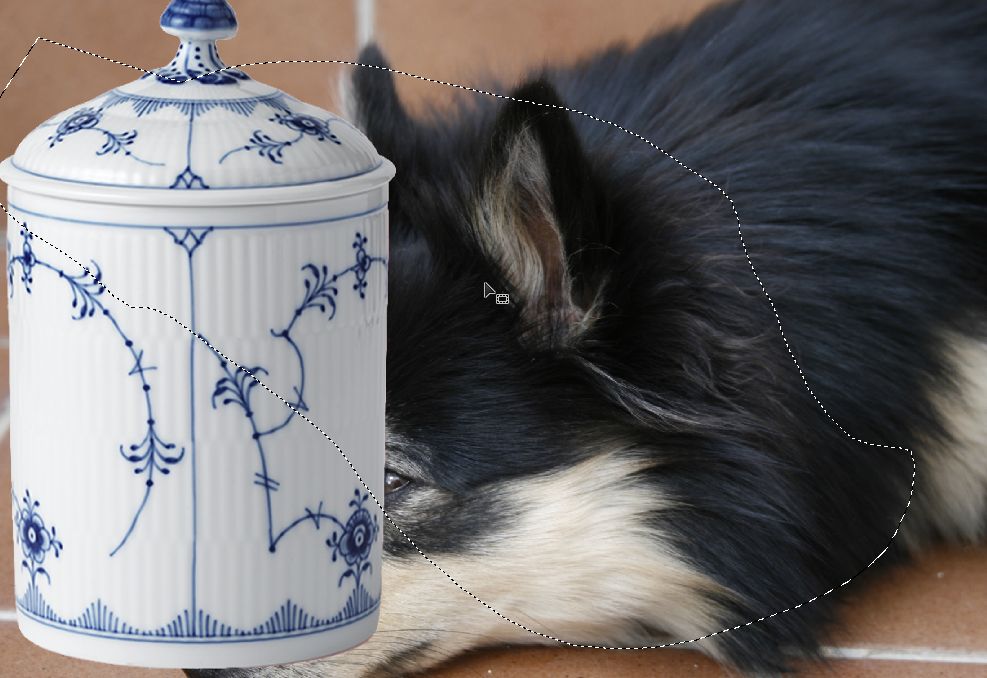
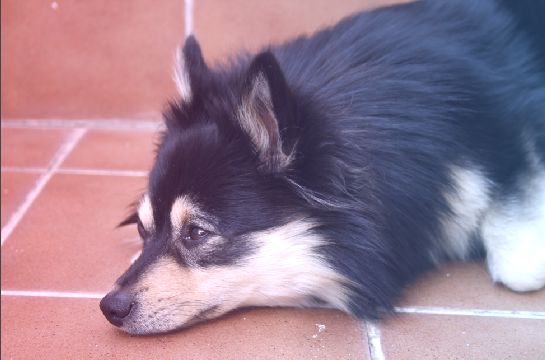
On the other hand we have Lasso tool which can be used to select areas manually by drawing the desired selection area with the mouse. As well as with the Magic wand tool, it allows us to add or subtract selections by holding down SHIFT or CONTROL key. This let us to select areas that Magic wand cannot. Lasso tool is used by selecting it on the Tools panel and drawing the area we want to select. Lasso tool has two modes: freehand or polygonal lasso . While freehand let us to draw any shape we want, polygonal will only let us to draw polygons by clicking on different points of the image.
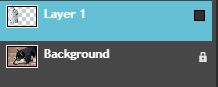
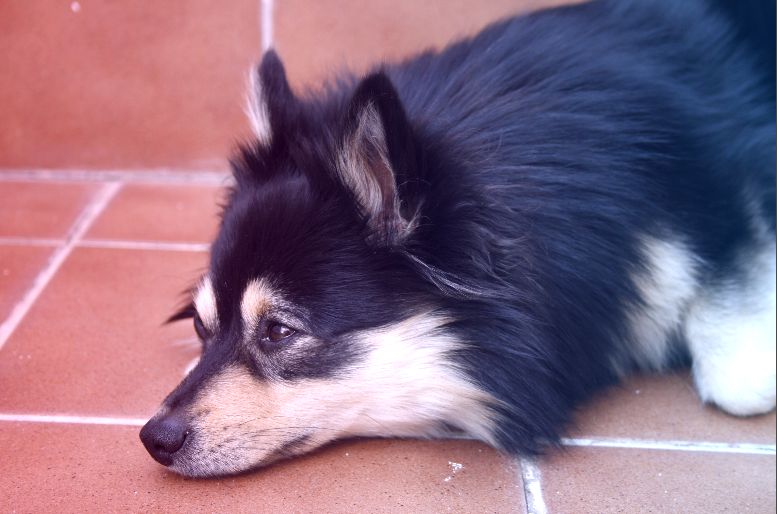
In this case, we are using Lasso tool for making the jar to be “behind” the dog. In essence, what we have to do is to make a selection which takes the area occupied by the dog, and then we delete the portion of jar that is inside the selected area. In order to being able to see the whole face of the dog while working, we can make the jar layer invisible by deselecting the checkbox placed on the right side of the layer.
Another option could be to decrease the opacity of this layer instead of making it invisible. This would allow us to keep seeing the area
covered by the jar.
To decrease the opacity we must click on Toggle layer settings button placed on the bottom of the layer window. An opacity slider will appear above it. The opacity slider thus controls the percentage of opacity on the selected layer. If it is placed on the right side, it means that the layer is totally opaque, so as to make it more transparent we must slide it to the left until we reach the desired opacity.
Make sure you have selected the layer you want to edit, if it is, it should be highlighted in blue. Then, follow the dog’s shape with the Lasso tool, and press DELETE key when the selection is over.
You may note that the new contour of the object looks too sharpen. You can use the Eraser tool to smooth it slightly. Erase tool is as easy to use as the Lasso tool, just click and drag over the part of the image you want to erase to delete it. In the tool options bar, you can change the size, the type of brush you are using and the opacity. Doing click on brush option will let us to change the kind of brush we are using and its properties.
In order to erase with a smooth finish, we need to use a brush with a low hardness parameter. Diameter, spacing and hardness parameters are placed on the bottom of the window. Sliding them to the left will make these parameters to be lower, on the other hand sliding it to the right will increase the parameter’s value. Diameter affects the size of the brush, Spacing controls the distance between the shapes that
conforms the brush, and Hardness control its sharpness.
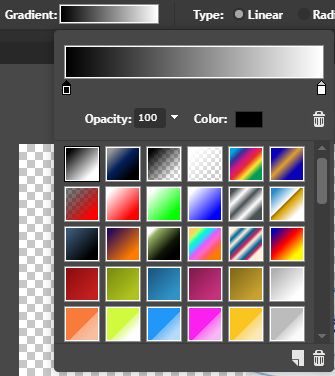
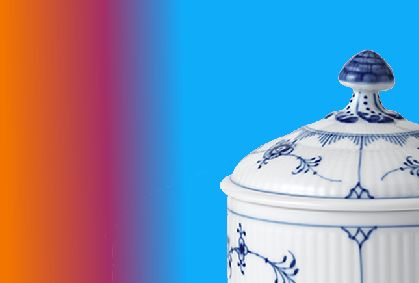
Gradient tool is useful for creating backgrounds and filters. Selecting it will display multiple options on the tool’s option menu, such us: Opacity, Gradient, Type, Spread method and Mode.
Opacity: It is measured as a percentage: the higher the percent, the stronger the color will be, while lower opacity values will give more transparency to the gradient. Gradient: Here we can select some default gradients or we can create new ones.
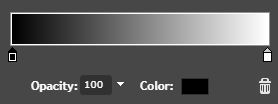
In order to personalize a gradient, we must click on each small square placed below the gradient bar. Here, in the screenshot, we can find two, one black in the left and one white in the right. Select one to be able to change the color.
We have selected the black one (the small arrow between the square and the gradient bar becomes black when it is selected). Then we can modify the Opacity parameter of this color and the color itself. To change the color just click on the Color parameter box .
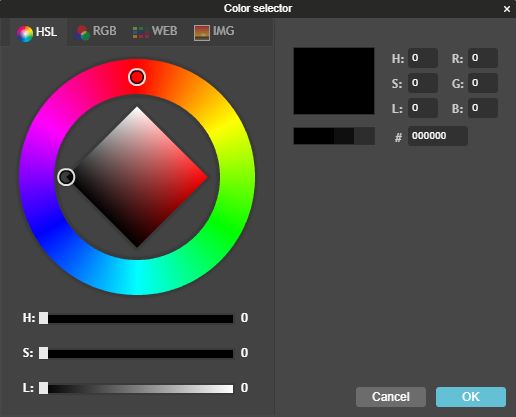
A Color selector will display.
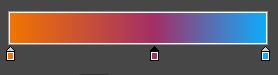
Default color selector is HSL which composes of two parts, a colourful ring, and a rotated square inside this ring. Each one control different parameters of the color. The ring controls color hue, if we want to change the color, for example, from red to blue, we have to select it on the ring. The square modifies the luminosity and the saturation of the color. Saturation is modified when the cursor is moved horizontally through the square; the closer to the right it is, the higher the saturation is. Luminosity parameter is changed as the cursor is moved vertically; the upper the cursor is, the higher the luminosity. Click OK and the selected color will apply. It is possible to add more colors to the gradient by clicking anywhere below the gradient bar. Slide the squares to adjust the distance between colors. To delete a color, select it and click on the Delete button placed to the right of the Color box.
Once the new gradient is done, we can use it or save it by clicking on the Create new gradient button placed on the bottom of the window . If we want to delete it, we can do it by selecting the gradient and doing click on the Remove gradient icon, placed immediately next to the Create new gradient icon.
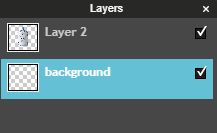
So as to use the gradient as background, create an empty layer and place it below the isolated item layer. Then fill it with the Gradient tool.
In order to do it, click where the gradient should start and then drag the cursor and drop it where the gradient path should end. Before doing that, make sure the background layer is selected.
Gradient option also let us to set the type of gradient we want to apply. It can be linear, which extend the colors from one side to another, or radial, which expand the colors from inside to outside.
Spread method allows us to set how the gradient behaves when it reaches the end of its path. It offers three options: Pad, reflect and repeat .
Pad option is the one we have been using through this guide. When it is chosen, the last color extend through the “remaining” area. So, if we set a small path for the gradient, the last color will take almost the whole area.
Reflect makes the gradient to return to the opposite side color from the Gradient bar when the last one has been reached.
Repeat reproduces the gradient. So, when the end of the path is reached, the gradient starts again where the previous one ended.
The last option available is the Mode settings. These settings effect how the gradients will appear when they are placed over an existing image. Mode settings includes: Normal, Add, Alpha, Darken, Difference, Erase, Hard-light, Invert, Layer, Lighten, Multiply, Overlay, Screen, Subtract. These modes are useful for using gradients as filters. Anyway, it is possible to apply the gradient in normal mode in a new layer and then modify the layer mode. This allows us to see how the gradient is going to work in each blend mode , avoiding the use of the trial and error method.
So as to use the gradient in a new layer, we have to place the new layer over the one you want to apply the filter. Then fill it with the desired gradient. After doing that, click on the Toggle layers settings button and change the mode from Normal to Add. The selection where the gradient has been applied should look like the image shown below this paragraph. You can apply it to the whole image and play with the opacity to find the way it fits better in the image. Feel free to explore different blend modes.
Important: if Gradient tool does not seem to work over the new layer, try to make a selection of the whole layer by doing click on Edit > Select all (Ctrl + D) on the menu bar.
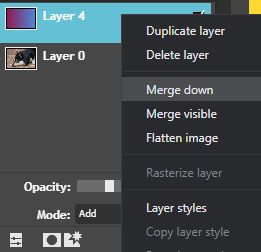
Once you get the desired effect, you can merge layer to make the change permanent by right clicking the gradient layer and clicking on Merge down option.
Now you have it in one layer and it will be considered as an image on its own. So, any further changes you make will affect it. In any case, this possibility us to make final touches such as levels adjustments.
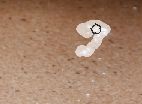
Repairing imperfection with spot heal toolClick to read
Spot heal tool allows us to remove dust spots or to repair perceived imperfections. If we find some imperfections on our image we can repair them by selecting the Spot heal tool and doing click on it. The tool’s option menu lets us to set the size and the type of the tool: Blend nearby or Generate pattern. Usually Generate pattern is used when the area we want to heal belongs to an image of a pattern.
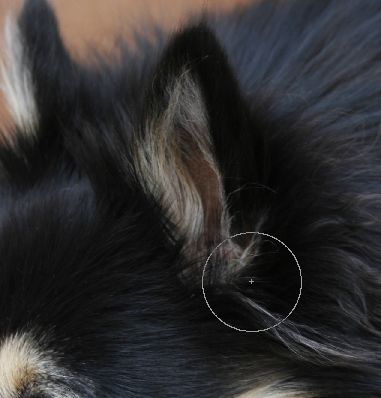
Clone stamp tool possibilities us to copy image details and to paste them in the place of our choosing. It can also be used for removing undesired details from the image such as dust spots or people. In the same way as the Eraser tool we can choose the brush style and its parameters through the tool’s option menu. The we find Brush, Opacity, Aligned and Sample all layers options. While Brush and Opacity settings work the same way they do in most of the tools; Aligned and Sample all layers are new options.
When Aligned is not selected, the details of the image that we set as sample point, will remain where it was initially placed until we sample it again. So, every time it is used, it will paste the original area again and again. When Aligned is selected, the sampling point follows your mouse as you move it. On the other hand, Sample all layers option set if you want to copy the detail as if all the layers were merged down
(activated) or if you want to copy only the detail from one specific layer (deactivated).
In order to set the sample point we have to hold down the CONTROL key and click on the area of the image we want to clone. While pressing the CONTROL key, mouse cursor icon will turn to a target icon to indicate to us that we are going to set the sample point. Click on it and unpress CONTROL key. Then, move the cursor to the area where we want to apply the sample and hold down the left mouse button to reproduce the sampled details over it.
For saving on your computer an image you have edited on Pixlr, go to the top menu and click File > Save (Ctrl + S)
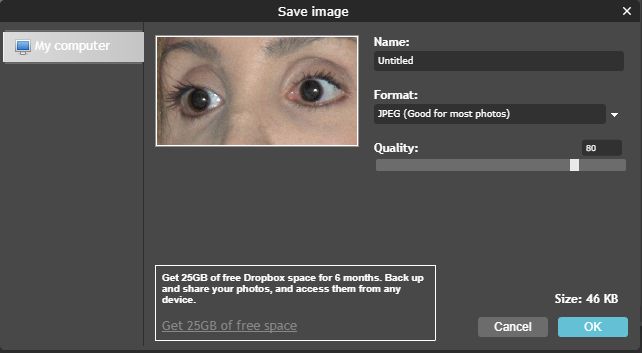
It will display a new window where you can name the image and select its format (JPEG, PNG, BMP, TIFF, and PXD). Use PNG format for images which have transparent areas. Below these options there are a slider for adjusting the quality of the image. Sliding it to the right will increase its quality.
Once we have the desired parameters click the OK button and it will display your local File Explorer with the purpose of selecting where do you want to save the file in your computer. Select the folder where you want to save it and click on the Save button. Then the image will be saved on your computer.
On average, 400 hours of video are uploaded to YouTube every minute. It is fascinating how the creation of audiovisual content is available to anyone. The scenarios on the Internet have already been created, now it is the turn of the people to offer original and above all quality content. Therefore, analyzing what I need to record a video (be it long or short), is essential since this work prior to taking the camera will avoid editing problems. In this training, you will learn about the OpenShot program, a free video editing software that you can install on your computer. This program will allow you to export videos and images to create new compositions. In addition to your videos, you can add music, texts, and transitions. You will no longer have excuses to be a great film director.
In this section, you will learn about free software image editing tools for the computer, which will allow you to retouch and correct your photographs. Most of the digital devices allow you to take pictures, you just have to point and take a photo, but why not learn to take good photos or retouch them. The images are in our day to day, for example, on an average day, 80 million photos are shared on Instagram. In this training you will learn how to use the PIXLR tool, which allows you to make corrections to images such as increasing brightness, balancing contrast or changing the size of the photo so that it is suitable for printing. In addition, you will learn to correct red eyes, many times people come out with a red eye pupil, but we will teach you how to correct it. Finally, once the course is finished, you will also have the necessary knowledge to remove the background of an image and replace it with a plain/gradient color, or with another image, for example, you will be able to change a photo of a beach background for a mountain. To promote a business, have a souvenir or we simply like to take photography, it is advisable to know how to make them and how to edit them, as well as the different ways to share them without losing our rights and storing them, since they usually take up space. An opportunity to edit photos and share moments of your life.
● Knowing a free software to edit video. ● Create composition with videos and pictures. ● Edit the video adding music, titles, transitions ● Get to know the free PIXLR photo editing program. ● Change the background of an image. ● Correct the characteristics of the image (contrast and light), as well as defects and red eyes.
The European Commission's support for the production of this publication does not constitute an endorsement of the contents, which reflect the views only of the authors, and the Commission cannot be held responsible for any use which may be made of the information contained therein.
Legal description – Creative Commons licensing: The materials published on the SOS Creativity project website are classified as Open Educational Resources' (OER) and can be freely (without permission of their creators): downloaded, used, reused, copied, adapted, and shared by users, with information about the source of their origin.
 Play Audio


 . Once it is selected, the top menu will show some relative parameters: constraint, width and height. While width and height let us to define the size of the crop area, constraint set some restrictions to this area: Aspect ratio or Output size . Aspect ratio allows to set the proportions we want by entering the relation between the width and height values. In this way, if we, e.g., set the width to 9 and the height to 16, the proportion will be similar to the actual smartphone’s screen aspect ratio. Setting Constraint on Output size option will restrict the cropping area to the original aspect ratio of the image.


 and Wand (also called “Magic wand”) tool
  .
.

 which work by dragging the item you want to move. In any case, you must be sure that the object you want to move is selected, and that the layer where it is in, is highlighted in blue.
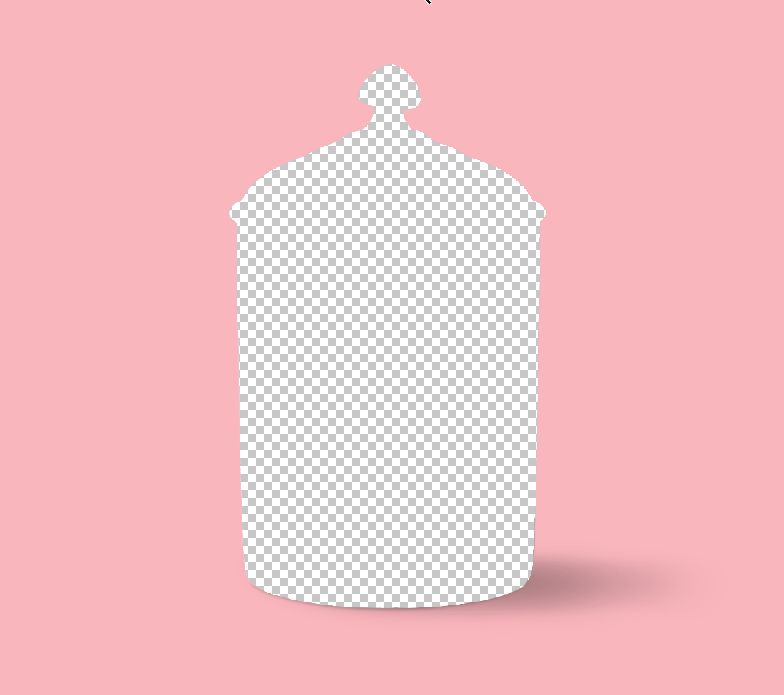
 placed on the bottom of the layer window. An opacity slider will appear above it. The opacity slider thus controls the percentage of opacity on the selected layer. If it is placed on the right side, it means that the layer is totally opaque, so as to make it more transparent we must slide it to the left until we reach the desired opacity.
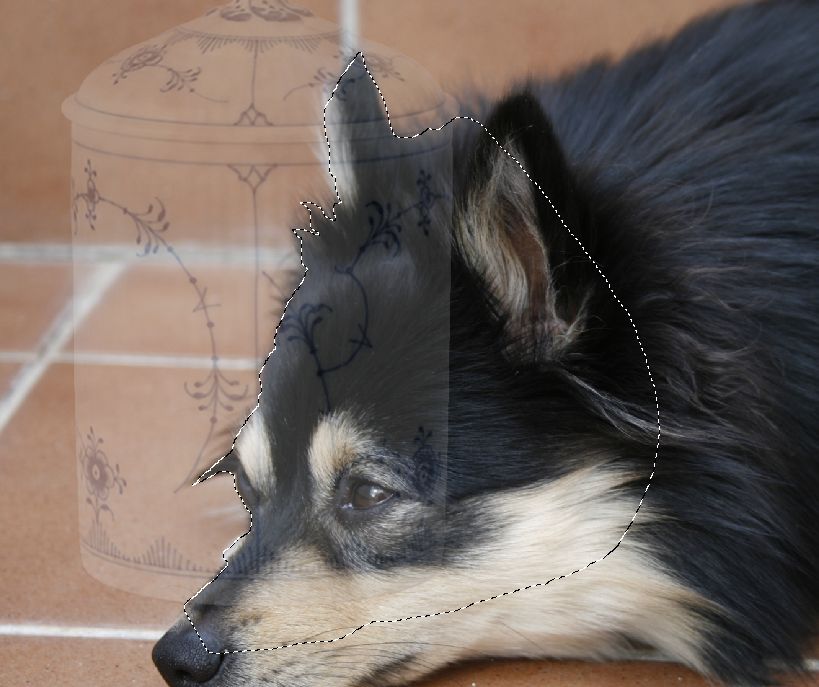
 to smooth it slightly. Erase tool is as easy to use as the Lasso tool, just click and drag over the part of the image you want to erase to delete it. In the tool options bar, you can change the size, the type of brush you are using and the opacity. Doing click on brush option will let us to change the kind of brush we are using and its properties.
 is useful for creating backgrounds and filters. Selecting it will display multiple options on the tool’s option menu, such us: Opacity, Gradient, Type, Spread method and Mode.
 .
.
 placed to the right of the Color box.
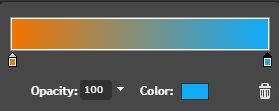
 . If we want to delete it, we can do it by selecting the gradient and doing click on the Remove gradient
  icon, placed immediately next to the Create new gradient icon.
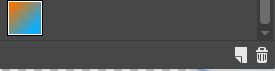

 and doing click on it. The tool’s option menu lets us to set the size and the type of the tool: Blend nearby or Generate pattern. Usually Generate pattern is used when the area we want to heal belongs to an image of a pattern.

 possibilities us to copy image details and to paste them in the place of our choosing. It can also be used for removing undesired details from the image such as dust spots or people. In the same way as the Eraser tool we can choose the brush style and its parameters through the tool’s option menu. The we find Brush, Opacity, Aligned and Sample all layers options. While Brush and Opacity settings work the same way they do in most of the tools; Aligned and Sample all layers are new options.
 is a simple as selecting it and clicking on the red eye.